A compost bin is the most valuable soil amendment system on any homestead. It converts kitchen scraps and garden waste into rich, dark, crumbly compost that improves soil structure, feeds soil biology, and provides slow-release nutrients to your vegetables without any synthetic inputs. Compost costs nothing to make, diverts waste from the landfill, and is genuinely the foundation of a productive organic garden. This guide covers three practical DIY compost bin methods, how to achieve fast hot compost, and how to troubleshoot the most common composting problems.
What Is Compost and Why Does It Matter?
Compost is the end product of the controlled decomposition of organic materials by bacteria, fungi, earthworms, and other soil organisms. Finished compost — dark, crumbly, and earthy-smelling — improves soil structure: adding organic matter that improves drainage in clay soils, water retention in sandy soils, and creates the aggregated structure that allows roots to penetrate deeply and soil organisms to thrive. According to the U.S. Environmental Protection Agency, food scraps and yard waste combined make up more than 30% of what Americans throw away. Composting this material instead of landfilling it reduces methane emissions from landfills — where organic matter decomposes anaerobically and produces a potent greenhouse gas — while creating a resource of genuine value for your garden.
The Carbon-to-Nitrogen Ratio: The Core Principle of Composting
Every composting challenge — a pile that does not heat up, a pile that smells bad, a pile that takes forever to break down — comes back to the carbon-to-nitrogen (C:N) ratio. Decomposer microorganisms need both carbon (for energy) and nitrogen (for building cell proteins) in roughly a 25:1 to 30:1 ratio by mass. Materials high in carbon (browns) include dried leaves, straw, cardboard, sawdust, and wood chips. Materials high in nitrogen (greens) include fresh grass clippings, kitchen scraps, fresh manure, coffee grounds, and fresh plant material. A simple working guideline: aim for roughly 3 parts brown material to 1 part green material by volume. Too many greens = wet, smelly pile. Too many browns = dry pile that barely heats.
Method 1: The Three-Bin Pallet Compost System
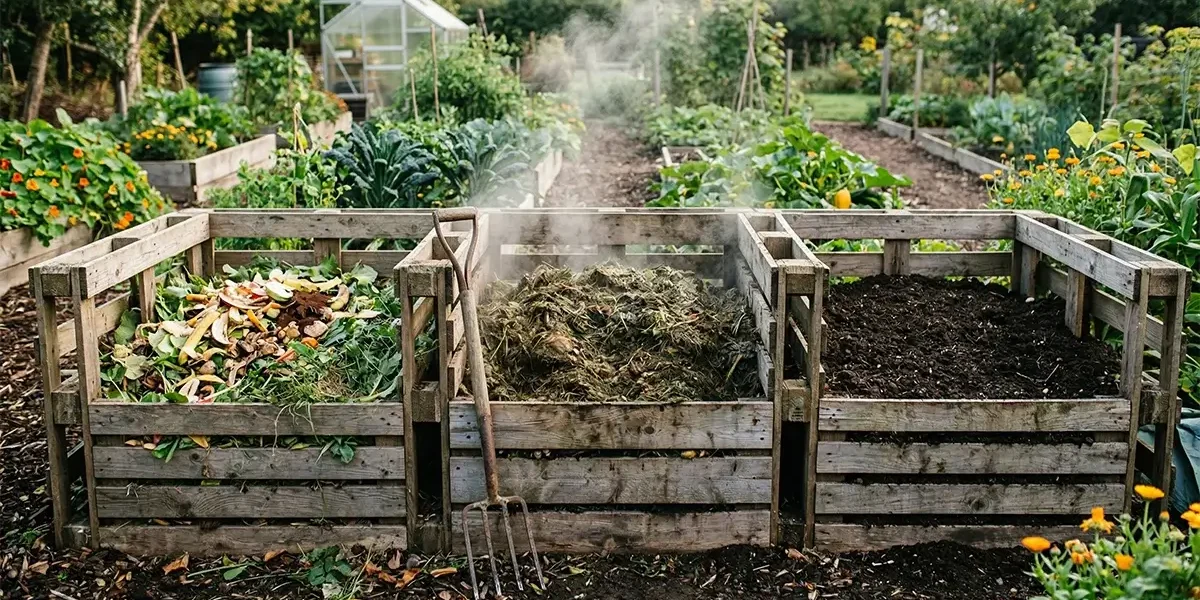
The three-bin system is the most efficient backyard composting setup for homesteaders producing significant quantities of garden and kitchen waste. It allows you to move compost from bin 1 (fresh materials) to bin 2 (active decomposition) to bin 3 (finished compost) in a continuous rotation, so you always have finished compost available when your garden needs it.
Materials needed: 9 to 12 wooden pallets (free from feed stores, hardware stores, or agricultural suppliers), wire or wood screws to connect pallets, optional wire mesh for front panels.
Construction: Stand three pallets on edge to form the back and two sides of the first bin. Connect the corners with wire ties or short screws. Repeat for bins 2 and 3 adjacent to the first, sharing side walls. Each bin should be approximately 4 x 4 x 4 feet — the minimum size for a hot compost pile. Smaller than this, the pile cannot generate or retain enough heat for rapid decomposition. Leave the front open or create a removable front panel from boards or wire mesh. Total construction time: 1 to 2 hours. Total material cost: $0 to $20.
Method 2: The Simple Wire Hoop Bin
For gardeners with limited space or lighter composting needs, a wire hoop bin is the simplest and fastest system to build. It costs under $10 and takes 15 minutes to assemble. Materials: 10 to 12 feet of hardware cloth or welded wire fencing 3 to 4 feet tall, 3 to 4 metal fence posts or wooden stakes, wire ties. Form the wire into a cylinder 3 to 4 feet in diameter. Secure the overlapping ends with wire ties. Drive stakes through the mesh into the ground for stability. To turn the pile, lift the wire form off, set it next to the pile, and fork the material back in. This design works well for single-household kitchen and garden waste.
Method 3: The Wooden Frame Bin
A well-built wooden compost bin is more aesthetically pleasing and more durable than pallets or wire. Use cedar, black locust, or ground-contact pressure-treated lumber for longevity. Build a 4 x 4-foot square frame using 2×6 or 2×8 lumber, leaving gaps of 1/2 to 1 inch between boards for airflow. A slatted front design — where boards slide in and out of vertical channel guides — allows easy access for turning and removing finished compost. Add a hinged lid of wooden frame covered with hardware cloth if you want to keep rodents out.
How to Build a Hot Compost Pile
Cold composting takes 6 to 12 months. Hot composting — an actively managed pile reaching internal temperatures of 130°F to 160°F — produces finished compost in 4 to 8 weeks and kills most weed seeds and pathogens.
Minimum volume: One cubic yard (3 x 3 x 3 feet) of material is needed to generate and retain sufficient heat. Smaller piles lose heat too quickly.
Build in layers: Start with a 4-inch layer of coarse brown material at the base for drainage. Add a 4-inch layer of nitrogen-rich material (kitchen scraps, fresh grass, manure). Add a thin layer of finished compost or healthy garden soil to inoculate the pile with beneficial microorganisms. Repeat the brown-green-inoculant layering until the pile reaches 3 to 4 feet in height. Water thoroughly — the pile should feel like a wrung-out sponge throughout.
Turning schedule: Turn the pile every 3 to 5 days for the first 3 to 4 weeks. Each turning introduces fresh oxygen that fuels the aerobic bacteria responsible for rapid decomposition and heat generation. After the pile’s temperature drops and no longer rebounds to 130°F after turning, the active phase is complete. Allow the pile to cure 2 to 4 more weeks before use.
What to Compost (and What to Keep Out)
Excellent compost materials: All vegetable and fruit scraps; coffee grounds and paper filters; tea bags; eggshells; grass clippings (in thin layers); dry leaves (shred for faster breakdown); garden trimmings; cardboard (remove tape, tear into pieces, wet thoroughly); straw and hay; untreated wood chips and sawdust; chicken, rabbit, and horse manure.
Keep these out: Meat, fish, and bones (attract rodents); dairy products (odor and rodent attraction); oils and oily cooked food; dog, cat, or human waste (pathogen risk); diseased plant material; invasive plants or plants that have gone to seed unless your pile runs hot enough to kill seeds; treated wood products.
Troubleshooting Common Composting Problems
Pile smells like ammonia: Too much nitrogen. Add dry carbon-rich browns and turn the pile to aerate. Smell should dissipate within 48 hours.
Pile smells like rotten eggs: Anaerobic conditions — the pile is too wet and compacted with insufficient oxygen. Turn immediately to introduce air, add dry brown materials.
Pile is not heating up: Check moisture — should feel like a damp sponge. Check mass — is it at least one cubic yard? Check C:N ratio — you may need more nitrogen-rich green materials. Check particle size — chop or shred larger materials for faster breakdown.
Pile is attracting pests: Do not add meat, dairy, or cooked food. Bury kitchen scraps in the pile’s center rather than on the surface. A wooden bin with a secured lid and hardware cloth floor effectively excludes most rodents.
Using Finished Compost
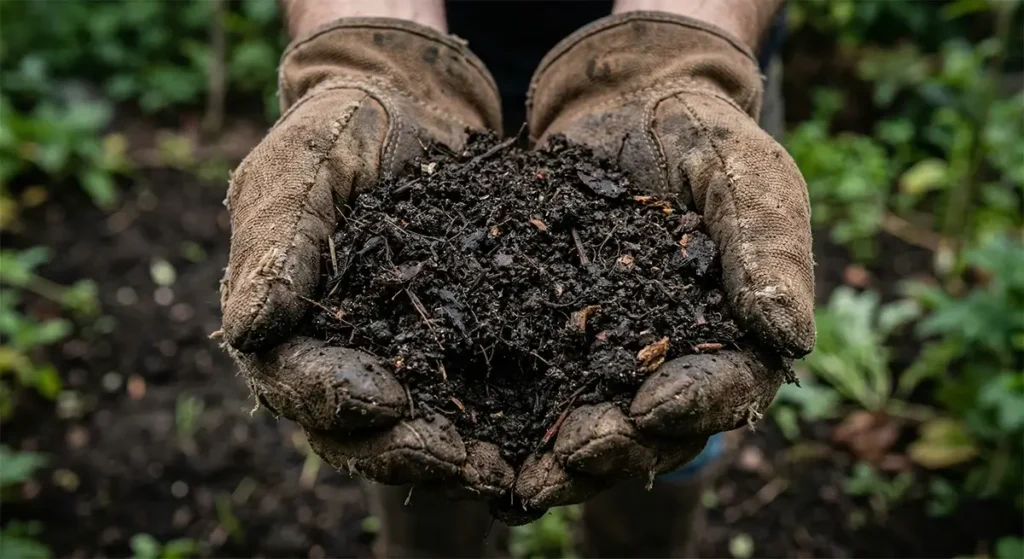
Finished compost is dark, crumbly, earthy-smelling, and unrecognizable as its original ingredients. Use it as a soil amendment (3 to 4 inches worked into garden beds in spring), a topdressing mulch around perennial plants, a component in seed-starting mix, or as a compost tea base for foliar feeding. There is virtually no way to use too much compost in a vegetable garden.
Final Thoughts
A DIY compost bin is the single highest-return-on-investment project on a homestead. The material cost is close to zero, the ongoing labor is minimal once the system is running, and the resulting compost meaningfully improves your garden’s productivity year after year. Build your first bin this weekend, start collecting kitchen scraps, and watch your waste become wealth.

Leave a Reply