
Dehydrating food at home is one of the most versatile, beginner-friendly, and space-efficient methods of food preservation available to the homesteader. Unlike canning — which requires specific equipment and exacting safety protocols — dehydrating has a gentle learning curve, very low risk of foodborne illness, and produces shelf-stable food that is lightweight, compact, and packed with concentrated nutrition. A fully loaded dehydrator can run on as little as 300 to 700 watts of electricity and produce a year’s supply of dried herbs, fruits, vegetables, and jerky at a fraction of the cost of store-bought equivalents. This complete guide covers everything you need to start dehydrating food safely and effectively at home.
Why Dehydrate Food? The Homesteader’s Case
Every food preservation method has its ideal applications. Canning is unbeatable for tomatoes and jams. Freezing preserves texture and nutritional quality better than any other method. But dehydrating offers unique advantages that the other methods cannot match:
- No electricity required for storage — unlike freezing, dehydrated food is shelf-stable at room temperature for 1 to 25 years depending on the product and packaging method
- Extreme space efficiency — a flat of fresh tomatoes reduces to a small jar of dried tomato slices; 10 pounds of apples becomes one pound of apple chips
- No special containers required — mason jars, mylar bags, or even zip-lock bags store dehydrated food adequately for 1 to 3 years
- Ideal for herbs, spices, and medicinal plants — the standard preservation method for homegrown herb gardens
- Portable, lightweight food — dehydrated food is invaluable for camping, backpacking, emergency preparedness, and bug-out bags
- Preserves seasonal surpluses — gluts of summer zucchini, cherry tomatoes, and peaches can be dried quickly and efficiently during peak harvest season
Choosing a Food Dehydrator
The right dehydrator makes a meaningful difference in both the quality of your dried food and the ease of the process. There are two fundamental design types:
Stackable Tray Dehydrators
Stackable dehydrators (like the Nesco/American Harvest models) heat from the top or bottom and circulate air up or down through the stack of round trays. They are inexpensive — good models cost $50 to $100 — and can be expanded by adding trays. The downside is uneven drying: the tray closest to the heat source always dries faster, requiring regular tray rotation during a drying run. They are adequate for occasional home use and herbs, fruit, and jerky at modest volumes.
Box-Style Dehydrators with Horizontal Airflow
Box dehydrators (Excalibur is the most respected brand) circulate air horizontally across square or rectangular trays, producing dramatically more even drying without tray rotation. The Excalibur 9-tray model at 15 square feet of drying space and 600 watts is the standard choice for serious homestead food preservation. At $250 to $350, it is a significant investment but one that pays for itself quickly in reduced food waste and preserved surplus. The square trays also allow non-round items — full herb bundles, large vegetable slices, fruit leather sheets — that do not work on round stackable trays.
Temperature Accuracy
Whatever dehydrator you choose, accurate temperature control is critical for both food safety and product quality. USDA guidelines require specific minimum temperatures for different food categories — 160°F for raw meat jerky, 130°F to 135°F for most fruits and vegetables. A dehydrator that cannot maintain consistent temperatures will either underdry food (safety and mold risk) or overdry it (poor quality and nutritional loss).
Food Safety in Home Dehydration
Dehydration works by removing the moisture that microorganisms need to survive and reproduce. The key principle is that moisture content must be reduced to a level at which microbial growth is inhibited — typically a water activity (aw) below 0.60 for most shelf-stable products. The National Center for Home Food Preservation’s drying guidelines are the authoritative reference for safe home dehydration temperatures and times for all food categories.
Critical food safety rules:
- Pre-treat meat before drying — raw jerky must reach 160°F internally to destroy E. coli and Salmonella. Either heat finished dried jerky in a 275°F oven for 10 minutes after drying, or heat raw marinated meat to 160°F before placing on dehydrator trays
- Blanch most vegetables before drying to deactivate enzymes that continue degrading quality even at low moisture levels
- Condition dried foods — after drying, allow product to cool to room temperature, then place in a loosely sealed jar for 7 to 10 days, shaking daily. If condensation appears inside the jar, the food is not adequately dry and must be returned to the dehydrator
- Test for dryness — properly dried fruits should be pliable and leathery with no visible moisture when cut; vegetables should be crisp and brittle; herbs should crumble between fingers
Dehydrating Herbs: The Simplest Starting Point
Herbs are the easiest and most immediately rewarding dehydration project for beginning homesteaders. They require no special pre-treatment, dry quickly at low temperatures, and the flavor of home-dried herbs is dramatically superior to the oxidized, flavorless commercial dried herbs sold in most grocery stores. Basic guidelines:
Harvest herbs in the morning after dew has dried but before midday heat, when essential oil content is at its highest. Wash gently if needed and dry thoroughly — surface moisture dramatically increases drying time. Strip leaves from thick woody stems. Spread in a single, uncrowded layer on dehydrator trays. Dry at 95°F to 115°F — low temperatures preserve the volatile aromatic compounds that give herbs their flavor. High temperatures drive off essential oils and produce flat, mediocre dried herbs. Typical drying times: basil and mint 12 to 18 hours; thyme, oregano, and rosemary 18 to 24 hours; sage 24 to 36 hours. Store immediately in sealed glass jars away from light and heat.
Dehydrating Fruits
Dehydrated fruit is one of the most popular and versatile dried food categories. The basic process for most fruits:
Preparation: Wash, peel if appropriate, core or pit, and slice to uniform thickness — 1/4 to 3/8 inch for most fruits. Uniform thickness is essential for even drying. A mandoline slicer dramatically improves consistency and speed.
Pre-treatment: Most fruits benefit from pre-treatment to prevent enzymatic browning (the gray-brown oxidation that occurs when cut fruit is exposed to air). The most effective home pre-treatments are a brief dip in lemon juice or ascorbic acid solution (1 teaspoon vitamin C powder per quart of water) or a quick blanch in steam. Sulfite dips are the commercial standard but controversial for home use due to potential allergic reactions.
Drying temperature: 135°F for most fruits. Drying times vary from 8 hours for thin apple slices to 36 hours for thick peach halves.
Fruits that dehydrate exceptionally well: apples, pears, peaches, apricots, plums (prunes), cherries, blueberries, strawberries, mangoes, and bananas. Fruits that do not dehydrate well include watermelon (mostly water, poor result) and avocado (fat content causes rancidity).
Dehydrating Vegetables
Dehydrated vegetables are the backbone of a homestead food storage pantry. Most vegetables must be blanched before drying to deactivate peroxidase and catalase enzymes that continue degrading color, flavor, and nutritional quality even at very low moisture levels. Steam blanching is preferred over water blanching as it reduces nutrient loss.
Blanching guidelines: Steam most vegetables 3 to 5 minutes (green beans, corn, peas, carrots, broccoli) until just tender-crisp. Do not over-blanch — the goal is enzyme deactivation, not cooking. Plunge immediately into ice water after blanching to stop carryover cooking, drain thoroughly, and place on dehydrator trays.
Vegetables that do not require blanching: tomatoes, onions, garlic, peppers, and mushrooms. Dry these raw. Tomatoes are particularly outstanding dried — slice Roma tomatoes 1/4 inch thick, arrange cut-side up, and dry at 135°F for 6 to 12 hours. Finished dried tomatoes are sweet, intensely flavored, and can be packed in olive oil, used in sauces, or rehydrated for soups and stews.
Dehydrate at 125°F to 135°F for most vegetables. Finished vegetables should be completely brittle and crisp — no flexibility or moisture when broken. If pliable, continue drying.
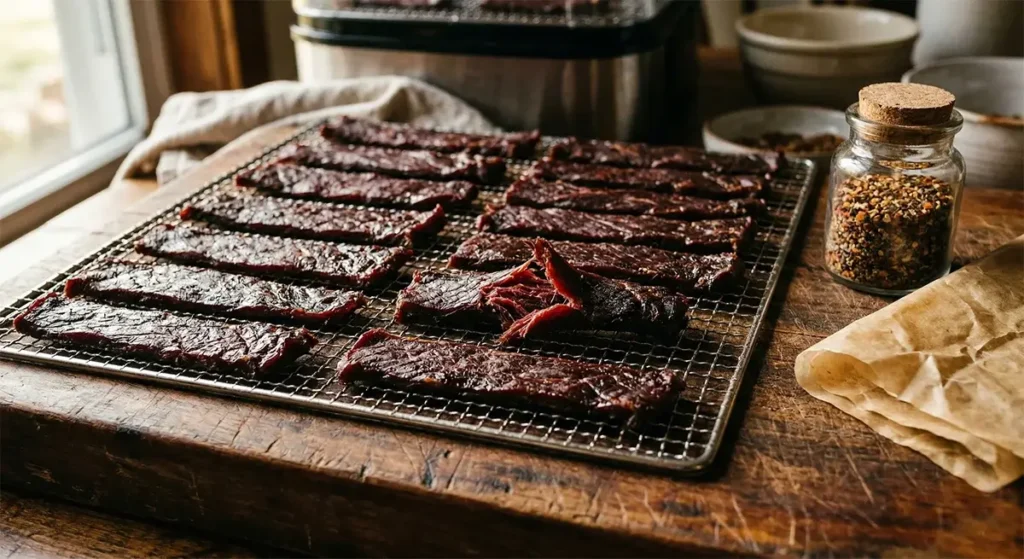
Making Jerky at Home
Homemade jerky is one of the highest-value dehydration projects: quality commercial jerky costs $8 to $15 per pound, while homemade jerky from good beef can cost $4 to $8 per pound including ingredients. The key is the marinade — a combination of salt (for flavor and preservation), acid (vinegar or citrus for tenderness and food safety), and flavor agents. A basic marinade for 2 pounds of sliced beef: 1/4 cup soy sauce, 2 tablespoons Worcestershire sauce, 1 teaspoon garlic powder, 1 teaspoon onion powder, 1 teaspoon black pepper, optional hot sauce to taste. Marinate 6 to 24 hours refrigerated. Pat dry before placing on trays.
Always heat jerky to 160°F as described earlier. Dry at 160°F for the first 4 hours, then reduce to 130°F for the remainder of the drying time (typically 6 to 12 hours total depending on thickness). Test by bending a strip — properly dried jerky bends and cracks without breaking completely and has no visible moisture in the center when torn.
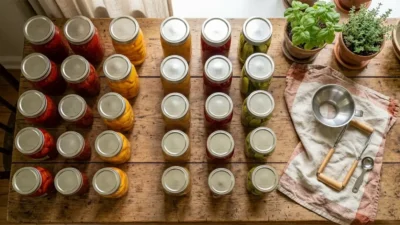
Storage and Shelf Life
Proper packaging dramatically extends the shelf life of dehydrated food. The enemies of dehydrated food quality are moisture, oxygen, heat, and light. For storage up to 12 months: sealed glass Mason jars kept in a cool, dark pantry. For 1 to 3 years: oxygen absorbers added to sealed Mason jars. For long-term (3 to 25 years): food stored in Mylar bags with oxygen absorbers, heat-sealed and placed in food-grade plastic buckets. Add a silica gel desiccant packet as additional moisture insurance.
Final Thoughts
Food dehydration is one of the most flexible and accessible preservation tools available to the homestead pantry. It requires minimal investment to start, scales gracefully from a small kitchen hobby to a serious bulk preservation operation, and produces foods that are genuinely superior in flavor and convenience to most store-bought equivalents. Start with herbs and apple slices — the easiest and most forgiving products — then expand into jerky, fruit leathers, and vegetable powders as your confidence grows.


Leave a Reply